It's A Party! - Fry Box Treat Holder

Today I was treated to the most amazing experience...a group of eleven Southern California and Arizona Stampin' Up! Demonstrators gathered today in San Diego for some stamping fun, great food, and lots of chatting!!

We were so fortunate that our upline Mary Fish and fellow demonstrator Tricia Chuba were able to make the trip over from Arizona to be there with us...I'm so grateful there were able to attend!

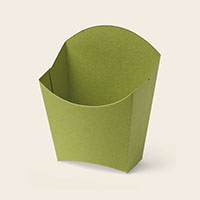
I was asked to make a project to demonstrate to the Pals today. I decided on a 3-D item so I broke out the Fry Box Die and got busy stamping!

So what do you think? Have you seen the Fry Box Die and wondered what on earth you would use it for? Now we know! Treat Boxes! Birthdays, Weddings, Baby Showers, Christmas, Halloween, the possibilities are endless! I absolutely love this die!

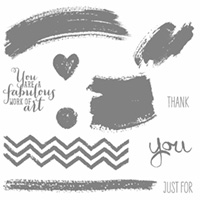
I just love these dots! They have SUCH character!!

I ran a piece of 5 1/2" x 8 1/2" Whisper White cardstock through the Big Shot, it cut the outlines and scored the fold lines all in one step! Next I inked up the dot stamp from the Work of Art stamp set and inked away in all different colors (being sure to clean the stamp very carefully between ink colors!). I took the colors right out of this fabulous piece of Sweet Taffy Designer Series Paper: Daffodil Delight, Melon Mambo, Old Olive, Pumpkin Pie, Rich Razzleberry and Tempting Turquoise.

I ran a piece of 3 3/4" x 3" DSP through the Big Shot to crop the top edge into the fry box shape and score the sides and bottom. Then I just took my paper snips and snipped away on the score lines, ran some Snail across the reverse side and adhered it right to the inside back of the fry box!

Then I just folded along all of the crease lines and put a piece of Sticky Strip along the outer edge of one of the flaps to create the box.

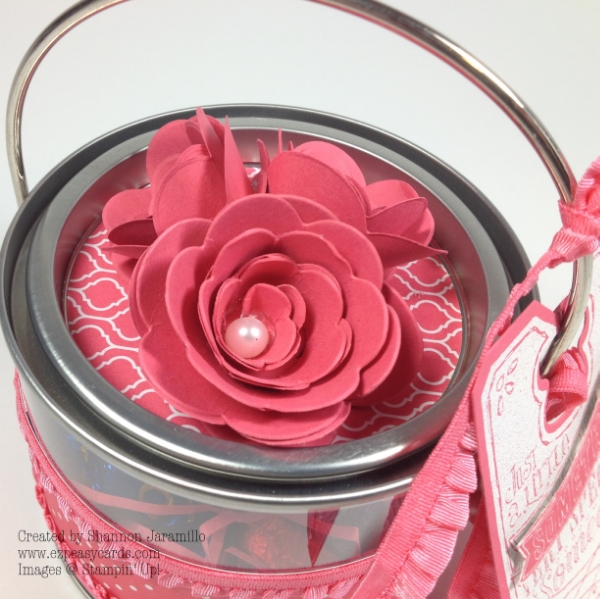
I used one of the stamps from the Oh My Goodies stamp set along with the smallest Deco Label Collection Framelit Dies and the Large Oval Punch to create my label. I adhered some flags to the back of the label to give it some "oomph" and attached the whole thing to my fry box with Sticky Strip.

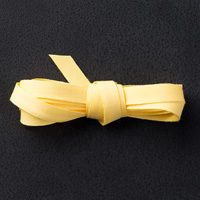
Just a little bit of this wonderful wonderful new 1/4" Cotton Ribbon in coordinating colors to  top off a cute treat bag finishes the project off beautifully. I love how all the products tie together!

Today was filled with fellowship with some wonderful ladies and beautiful projects! I will get them all photographed, put together a summary of all the projects, and have them up on the blog tomorrow. Please stop by, you won't want to miss them! The Pals are a very talented collection of Stampin' Up! Demonstrators!!

Thank you so much for stopping by, I would love it if you have time to leave me a comment to let me know what you think of the Fry Box Die and my project!

Special Edition - Treats for My Pals

Special Edition - Treats for My Pals

Yes, I usually have a clean and simple card for you on Saturday but since I made one on Thursday and I am so excited to share this that I thought I would change things up a bit!

I have to admit, I don't really think of myself as 'crafty' in a 3-D kind of way and I have always thought glue guns were my nemesis. That said, this project REALLY surprised me with how easy it was and how quickly it came together!

The history...as you read this I will be enjoying a wonderful retreat with other Stampin' Up! demonstrators, many of whom are also fellow Pals and fellow down line of the truly AMAZING Mary Fish. I can't wait to meet with them all. I am so excited to be a part of the energy and knowledge that will be  surrounding me and I will be soaking it all in and hopefully come home with renewed excitement and tons of great ideas. Can you tell I'm looking forward to it?!?

I will be meeting two of my fellow Pals who are also attending the retreat in Phoenix and we will be carpooling for the short drive to Tucson. How fun to get the party started early!

I thought and thought about how I could show my appreciation in a way that was not a card...remember, I'm 3-D challenged :) Then I came across this awesome idea from Jen Timko. I changed it up just a bit because I wanted to try out my new Spiral Flower original die:

Special Edition - Treats for My Pals

How about that spiral flower????? So amazing and easy and FUN!! Really! I was so surprised and pleased I was actually giddy :) Here's a view of the flowers from the other side:

Special Edition - Treats for My Pals

Honestly, these are my first three spiraled flowers! So if I can do it, ANYONE can! lol

Here's a picture of the second treat container in Strawberry Slush:

Special Edition - Treats for My Pals

Isn't this color just delicious?! Oh yes, let's not forget the yummy chocolates inside that a perfect for a little pick-me-up after a long day of learning and sharing! And I did manage to save some of the yummy Sea-Salt Caramel Dark Chocolate Dove Squares to put in these treat containers...mmm...I only had one or two (promise) lol.

I used matching cardstock for the gift tag and stamped the image from Chalk Talk in Versamark Ink and then heat embossed with White embossing powder. The last step was to using the matching Chalk Talk Framelits Dies and my Big Shot to cut them out. I just love Stampin' Up!'s coordinating products! I stamped the same image in Strawberry Slush ink onto a piece of scrap Whisper White cardstock and then fussy cut it out and popped it up onto my tag with Stampin' Dimensionals (a girl's best friend).

One more peek at these fun spiral flowers:

Special Edition - Treats for My Pals

Special Edition - Treats for My Pals

Do you agree that pearls in the center of the flowers are a perfect finishing touch?

I loved making these and foresee many more of these little spirals flowers in my future! I really hope my wonderful Pals Linda and Peggy enjoy them. I sure did enjoy making them!

Thank you for stopping by and I hope you enjoyed today's project!

I will be back next week with photos and swaps to share! Woo Hoo!

Sweater Weather Seasonal Decor

Hello again! Today I have a little project to share with you. One that has me out of my card comfort zone and into the world of 3-D, paint, sandpaper, and glue guns. But it was worth it! These little guys are going to go with me to work and bring a little seasonal cheer to my office!

Aren't they FUN??

I found these cute little trees online here and I knew at once that they had to come live with me!

The wood pieces come unfinished and unassembled so I ran and picked up some generic craft paint and set right to work! After several coats of paint I sanded the edges of the trunks down to give them a rustic feel.

I then adhered Stampin' Up!'s Sweater Weather Designer Series Paper to the trees with Modge Podge and used my glue gun to glue the trunks to the tree tops. I sponged Chocolate Chip ink around the edges of the paper to add definition and then decorated with Linen Thread and buttons! EZ Peasy!

Here's a closer look at the sponging and details :)

I would love to hear what you think of my fall trees!

Stampin Supplies: 

Stamps: None

Paper: Sweater Weather (132184) Designer Series Paper

Ink: Chocolate Chip (126975) Classic Stampin' Pad

Tools: Sponge Daubers (102892)

Embellishments: Naturals Designer Buttons (127554); Subtles Designer Buttons (130030); Natural Linen Thread (104199); Antique Brads (117273); 1 1/4" Burlap Ribbon

Other: Wood Trees, Craft Paint, Fine Sandpaper, Modge Podge, Glue Gun