Garden Party Celebration - PPA216
/The Pals Paper Arts Challenge has a fun sketch for you this week:
And here is how I interpreted the sketch:
Garden Party Celebration - PPA216
I chose to use the scrumptious Sweet Sadie Washi Tape as my jumping off point because the color combination is just out of this world!! Love it!! And I knew I wanted to use this yummy washi tape on a banner. But what to do with layers two and three when I don't have any coordinating designer series paper? Hmmm...after a bit of internal debate, I challenged myself to create my own designer series paper!
I pulled out the Garden Party stamp set which I confess, I bought for just this one flower, and started stamping! How did I stamp it in two colors? Well, I could have used my Stampin' Markers but I sometimes have trouble getting consist color with that technique and I knew I was going to be stamping multiple times so I chose to mask my stamp instead.
What is masking? It is the process of covering up part of an image on a stamp so that you can use just the part you want.
I made two masks for this project, one for the flower and another for the leaves. I stamped the entire image onto a Post-It note, making sure that the sticky area of the Post-It was directly underneath my stamped image. I did this twice. Then I carefully snipped out the flower image on one and discarded it. I did the same on the other image for the leaves. Then I laid my mask over the corresponding part of the stamp image and inked up my flower (or leaves). Please remember to remove the mask before you stamp your image!! lol (I, of course, have never forgotten to remove the mask...uh-oh, my nose is growing!)
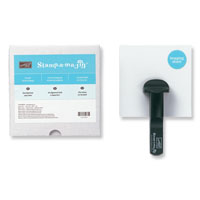
I stamped my flower first and then lined up where I wanted my leaves to be and added them, using Pistachio Pudding. I repeated the process until I had filled the entire area. Of course, I used my Stamp-A-Ma-Jig to place everything before I stamped:)
Cleaning the image carefully in between stamping is key to success with this technique.
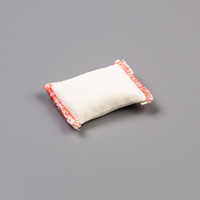
I trimmed two slivers of cardstock in coordinating cardstock and used them to separate the flower pattern from the sentiment, which I stamped with my Versamark Ink Pad and heat embossed using Black Embossing Powder. I masked again so I could emboss just one part of the stamp in black and then stamp the other part in Crisp Cantaloupe, using my Stampin' Write marker to ink it up.
To create the banner I layered strips of the Sweet Sadie Washi Tape to a scrap piece of Whisper White cardstock. I snipped one end off into a banner and attached it to my card with Stampin' Dimensionals. The last step was adding three very pretty Crisp Cantaloupe sequins from the 2013-15 In Color Sequin Assortment, the perfect jewelry!
I love how the thin border of Basic Black cardstock compliments the black in the washi tape and embossing. Three again, the magic number for a balanced look!
I looked through all of my Designer Series Papers and found one from the All Abloom DSP Stack that coordinated very nicely with my card but I didn't have enough to make an envelope liner (gasp). So instead, I adhered my scrap onto my envelope flap and snipped around the edges of the flap...a fun and quick way to decorate an envelope!
I hope you have enjoyed today's card and I can't wait to see what you create with this sketch!
Thanks for stopping by!
I'm leaving you today with a sneak peek at tomorrow's card, a preview of products from the upcoming holiday catalog...please make sure to stop by tomorrow to see it!


