Garden Party Celebration - PPA216

The Pals Paper Arts Challenge has a fun sketch for you this week:

And here is how I interpreted the sketch:

Garden Party Celebration - PPA216

I chose to use the scrumptious Sweet Sadie Washi Tape as my jumping off point because the color combination is just out of this world!! Love it!! And I knew I wanted to use this yummy washi tape on a banner. But what to do with layers two and three when I don't have any coordinating designer series paper? Hmmm...after a bit of internal debate, I challenged myself to create my own designer series paper!

I pulled out the Garden Party stamp set which I confess, I bought for just this one flower, and started stamping! How did I stamp it in two colors? Well, I could have used my Stampin' Markers but I sometimes have trouble getting consist color with that technique and I knew I was going to be stamping multiple times so I chose to mask my stamp instead.

What is masking? It is the process of covering up part of an image on a stamp so that you can use just the part you want.

I made two masks for this project, one for the flower and another for the leaves. I stamped the entire image onto a Post-It note, making sure that the sticky area of the Post-It was directly underneath my stamped image. I did this twice. Then I carefully snipped out the flower image on one and discarded it. I did the same on the other image for the leaves. Then I laid my mask over the corresponding part of the stamp image and inked up my flower (or leaves). Please remember to remove the mask before you stamp your image!! lol (I, of course, have never forgotten to remove the mask...uh-oh, my nose is growing!)


I stamped my flower first and then lined up where I wanted my leaves to be and added them, using Pistachio Pudding. I repeated the process until I had filled the entire area. Of course, I used my Stamp-A-Ma-Jig to place everything before I stamped:)

Cleaning the image carefully in between stamping is key to success with this technique.

I trimmed two slivers of cardstock in coordinating cardstock and used them to separate the flower pattern from the sentiment, which I stamped with my Versamark Ink Pad and heat embossed using Black Embossing Powder. I masked again so I could emboss just one part of the stamp in black and then stamp the other part in Crisp Cantaloupe, using my Stampin' Write marker to ink it up.

To create the banner I layered strips of the Sweet Sadie Washi Tape to a scrap piece of Whisper White cardstock.  I snipped one end off into a banner and attached it to my card with Stampin' Dimensionals. The last step was adding three very pretty Crisp Cantaloupe sequins from the 2013-15 In Color Sequin Assortment, the perfect jewelry!

I love how the thin border of Basic Black cardstock compliments the black in the washi tape and embossing. Three again, the magic number for a balanced look!

I looked through all of my Designer Series Papers and found one from the All Abloom DSP Stack that coordinated very nicely with my card but I didn't have enough to make an envelope liner (gasp). So instead, I adhered my scrap onto my envelope flap and snipped around the edges of the flap...a fun and quick way to decorate an envelope!

I hope you have enjoyed today's card and I can't wait to see what you create with this sketch!

Thanks for stopping by!

I'm leaving you today with a sneak peek at tomorrow's card, a preview of products from the upcoming holiday catalog...please make sure to stop by tomorrow to see it!

Tap Tap Tap - PP193

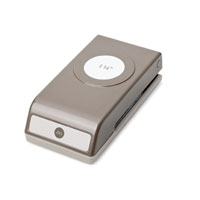
Last night was the 2014-15 Stampin' Up! Catalog Premier and wow, did they bring it in with a bang! A wonderful, wonderful live event in Long Beach, CA which I was fortunate enough to be geographically close enough to get to go to. The live event was broadcast simultaneously to demonstrators in theaters across the United States, complete with prize patrols and so much fun!! I have fun photos of the event over on my Facebook page. Here's a peek at the new goodies I took away from the event last night. Stampin' Up! really outdid themselves!

About the new catalog, just WOW WOW WOW!! I love all the fresh clean images and papers and colors and kits and...and...words fail me. Really. I just love it! As a demonstrator I have catalogs (yes, plural) and am allowed to share them with you in person. So, local friends, please contact me to receive your copy, while supplies last :)
Without further ado, here is my card made using new product!

Tap Tap Tap - PP193

Aren't the colors delicious?!? I thought the Paper Players sketch by Anne Marie this week allowed me to showcase them beautifully!

And just what colors ARE they? Most of them you are familiar with: Baked Brown Sugar, Coastal Cabana, Pistachio Pudding and Crisp Cantaloupe. The one new color in the new Lullaby Designer Series Paper is Hello Honey. Yep, a warm, rich yellow. It's the answer to all the critics of Summer Starfruit and while I personally liked that shade of yellow, I can see that this new Hello Honey is going to be used a lot by me!

As you may have guessed by the name "Lullaby", this Designer Series Paper is intended to use for baby cards, with both masculine and feminine colors. BUT...as you can see, they can be used for so much more! The colors and patterns are so fresh and clean! LOVE!!!

Tap Tap Tap - PP193

At the event we were fortunate enough to receive one of every staff member's favorite new product. This stamp set, Tap Tap Tap, was Shelli's favorite so of course I had to feature it today! I love the vintage feel of the typewriter as well as how it still works perfectly with the fresh clean look of the paper. There are more fabulous and useful images in this set, I just couldn't fit anymore on this card! I can't wait to get inky!! The mojo is flowing today :)

Thank you so much for stopping by and I would love to hear what you think of these new products!


Perfect Notecards...

Perfect Notecards...

Aren't these fun? These are the Watercolor Wonder Designer Note Cards & Envelopes found on page 23 of the Occasions Catalog. I purchased these awhile ago but wasn't quite sure how to use them. Then a co-worker mentioned that she liked to keep cards in her desk at work, just in case. And it clicked! These would be PERFECT for that!

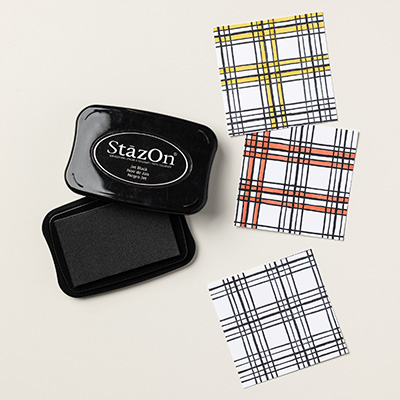
So I sat down to put them together. I wanted to keep it simple so that if you do not own a lot of stamping product, you could still make these quickly and easily. I limited myself to ONE stamp set so I chose Peaceful Petals for the variety of designs, the sentiments, and the fonts. They just seemed to fit these note cards very well. And the note cards! Wow! They are printed on watercolor paper so  they have SUCH a nice texture to them. Very elegant :) I also kept it to ONE ink so I chose StazOn Black ink. It stamps a nice crisp image and dries almost instantly. Perfect for me, I HATE to wait :)

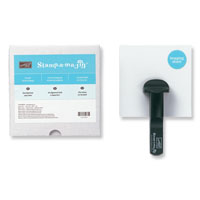
Don't you think they would be perfect to have on hand for...whatever? And you could still say that you made them...with one stamp set and one ink pad. Oh, and if you are like me and can't commit without seeing it first, you should also purchase the Stamp-a-ma-Jig. It allows you to see the placement of your image BEFORE you stamp! Money well spent!

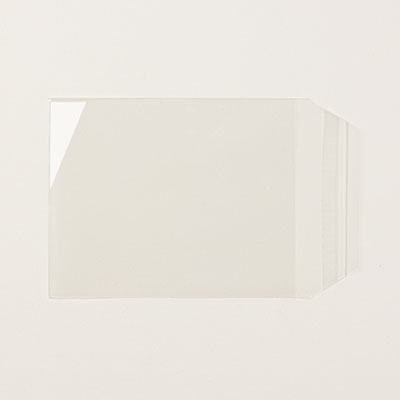
So then I thought...these would make a perfect gift! How can I package them? Well...it turns out that our clear envelopes just happen to fit 5 note cards and envelopes perfectly! Who knew?

Perfect Notecards...

Isn't that FUN?!? Okay, when I gussied them up I did add a tag cut with the Big Shot and the Chalk Talk bundle...but isn't it cute? You could easily use either the Angled or Scalloped Tag Topper Punch and hand write the sentiment if you don't own a Big Shot.

So to sum this all up...


You could get all this, with a stamp set and an ink pad, for as little as $2.50 per card, if you make your purchase between April 21st and April 25th and get free shipping. If you purchase two sets of note cards, the price goes down to $1.57 per card. And all you will ever need to do is buy more note cards. Such a deal for a handmade card!

I'm thinking of hostess gifts, teacher gifts, book club gifts, Christmas gifts...so many choices! Who would you make a set for? Please leave me a comment and let me know!

Thanks for stopping by!


A Simple Hello - PPA200

A Simple Hello - PPA200

What a fun layout for today's post! I love all the layers but I tried to get fancy with the layers on my first attempt so it went in the round file. I have to remember to "Keep it simple, Shannon!" lol

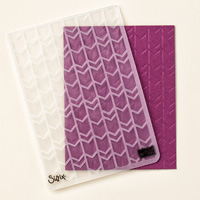
I tried out a few new-to-me goodies on today's card. The Arrows Embossing Folder just came a few weeks ago and I LOVE how the geometric lines of it compliment the pattern in this paper from the Gingham Garden Designer Series Paper! Now, you might think that I would continue with that theme for the stamp set but for some reasn I chose it's polar opposite, a foo-foo floral image from the Backyard Basics stamp set. You wouldn't think they would go together but I think they work very well together! Who knew?! And even better, all the stamps in this set have matching framelits! 

I have been eyeballing this stamp set since the Annual Catalog came out last June but was hesitant to purchase it because I might have to COLOR the image in! (gasp). I admit, I did stamp the image in Black StazOn ink and attempt to color it. Yep, it went in the round file too! Then I decided to just stamp it in Island Indigo and let it be...Perfect! I popped the image up with Stampin' Dimensionals and paired it with a simple sentiment from the stamp set A Dozen Thoughts. I punched the sentiment out with my 3/4" x 15/16" Oval Punch and layered it over a few strands of Island Indigo Baker's Twine. As a last thought, I added two Whisper White Candy Dots to the upper right hand corner. And there you have it! Simple and Clean.

Here is the sketch that inspired this card:

6a019104363fb3970c01a5119fb794970c-320wi.png

Today's sketch is a milestone for the Pals Paper Arts Challenge Blog. It's their 200th challenge! Wow! They have done a fabulous job of inspiring me so I wondered just when I started playing along with them? Turns out it was April 8, 2012 with PPA132. Here's my first card for that challenge:

I hope you've enjoyed the walk down memory lane. Thanks for taking the trip with me...! And as always THANK YOU for stopping by:)